1、Smartproxy
Smartproxy’s residential proxies offer a massive pool of over 55 million IPs across 195+ global locations. When integrated with Maskfog, handling multiple accounts and switching between various browser profiles becomes an easy task.
Apart from using residential proxies for multi-accounting, users can harness ‘em for activities such as web scraping, overcoming geo-restrictions, monitoring retail price changes, protecting their brand, and various AdTech tasks. As these IPs are sourced from real household devices connected to local networks, targets identify residential proxies as genuine users.
Click to Smartproxy:Smartproxy
2、Setting up Smartproxy
To use SmartProxy with the Maskfog browser, follow these steps:
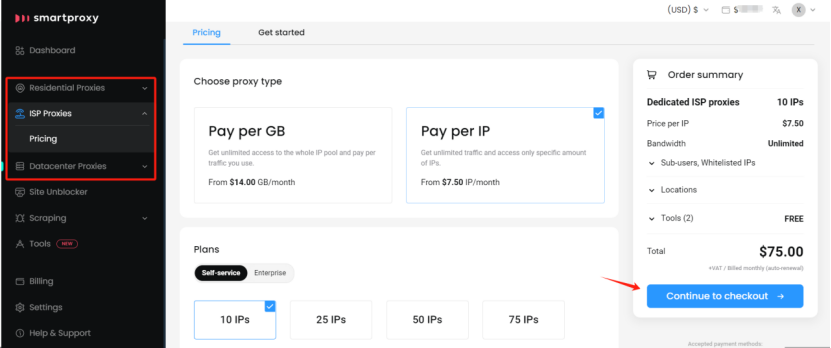
2.1. Go to the Smartproxy official website, register, and log in. In the dashboard, select the proxy type and plan you need, then proceed with the payment.
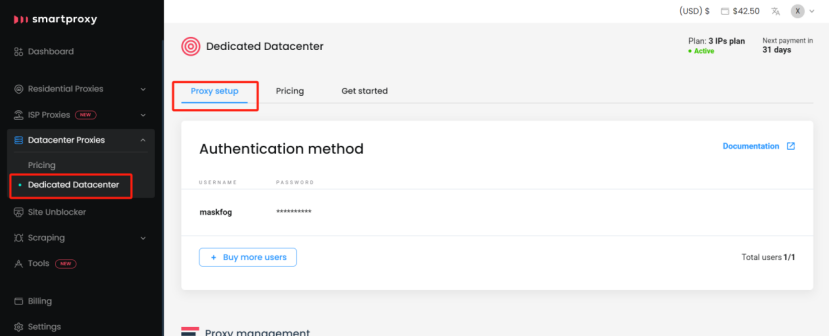
2.2. After the purchase, open the proxy setup tab (using Datacenter proxy as an example here).
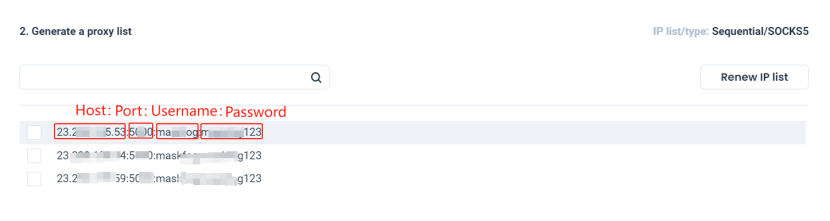
2.3. Scroll down to Proxy Management, enter your Username and Password as needed. You’ll see the proxy list auto-generate the proxy information below.

2.4. Check the format of the generated proxy information, which typically includes Host:Port:Username:Password.
3、Integrating SmartProxy with Maskfog
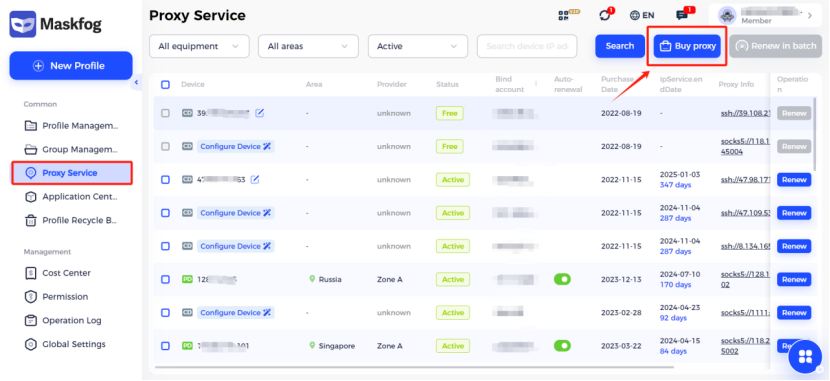
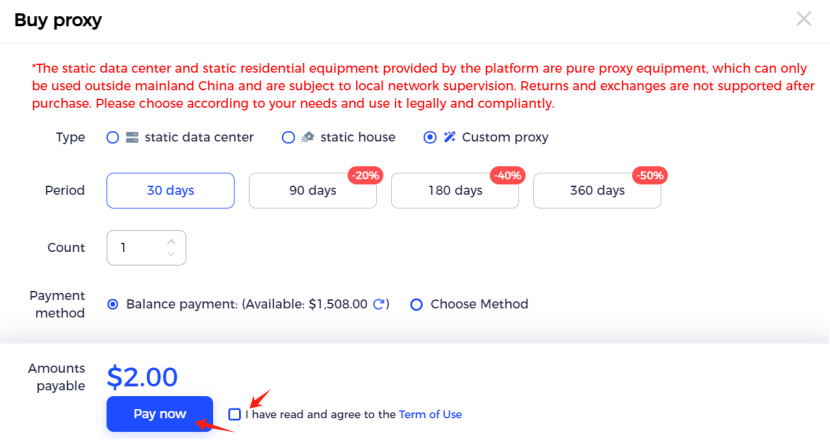
3.1. Open the Maskfog fingerprint browser, click on the “Proxy Service” tab on the left, and select “Buy proxy.”
3.2. Choose “Custom Proxy” for purchase. This option is used to configure proxies other than those provided by Maskfog, including Smartproxy.
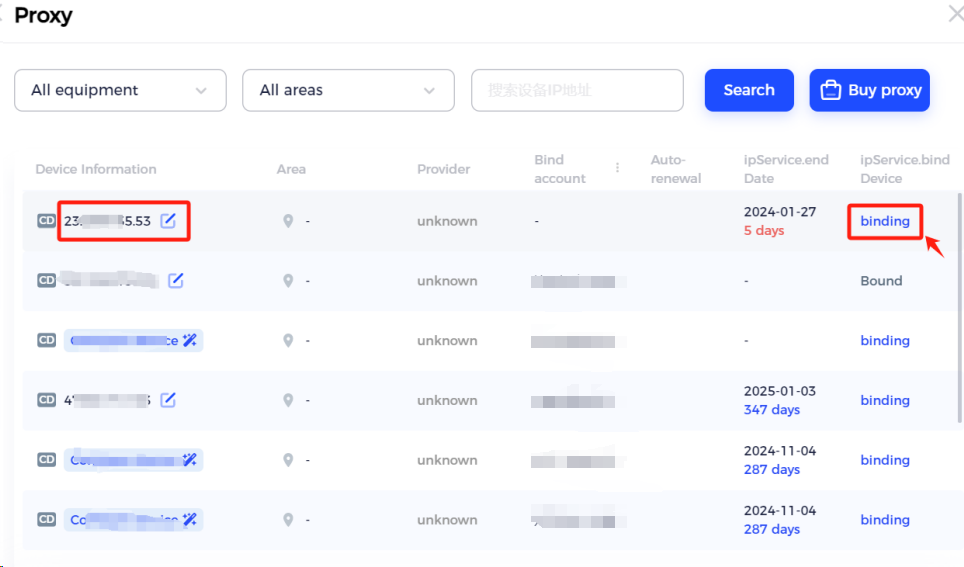
3.3. After the purchase, in the “Proxy Service List,” filter by “Custom Devices” to find the Custom Proxy you just bought. Click on “Configure Device.”

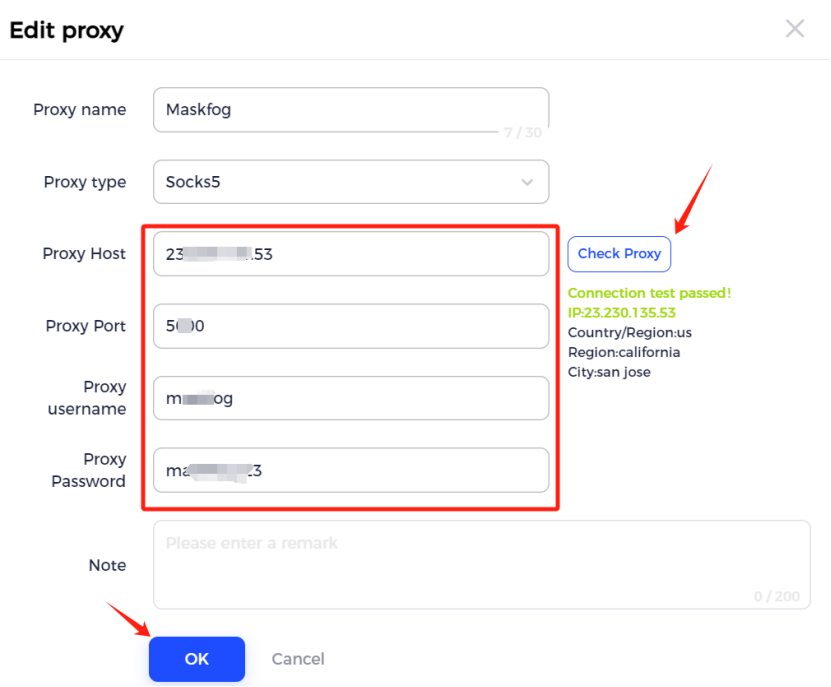
3.4. Enter the Host:Port:Username:Password obtained from SmartProxy into the corresponding fields. Click “Check Proxy,” and upon success, click “OK” to save.
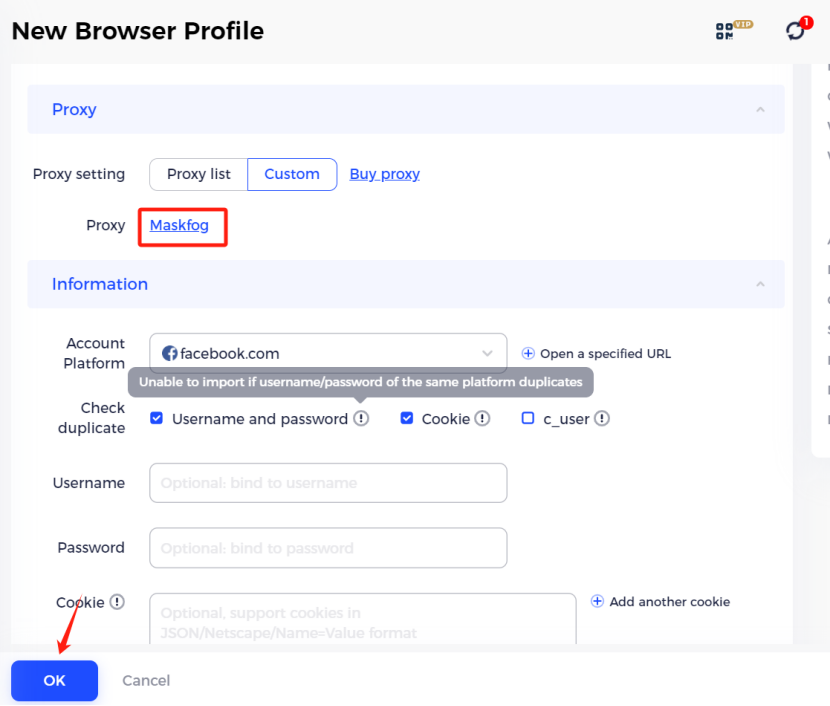
3.5. Next, when creating a “New Profile,” navigate to the “Proxy” tab, choose “Custom,” and select the SmartProxy you configured. Bind it to your newly created profile.
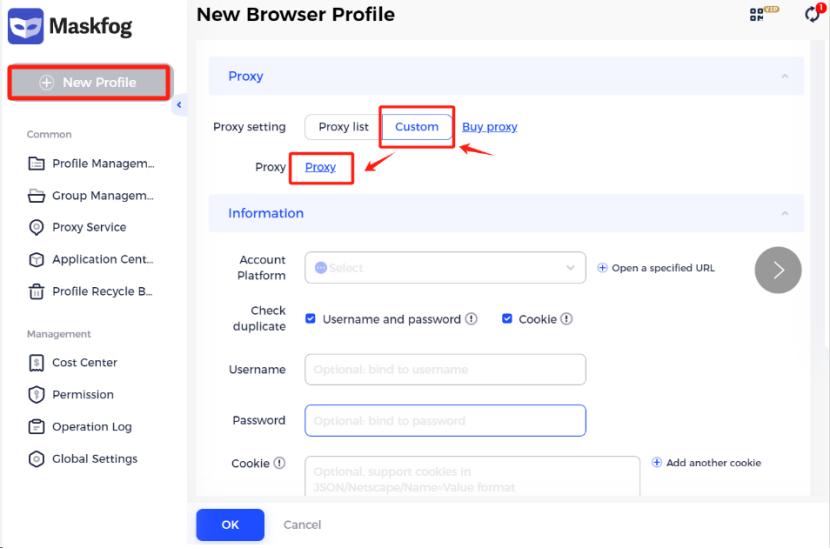
3.6. After binding, configure the remaining profile parameters, click “OK,” and you are ready to browse securely in an incognito environment!
These steps will ensure the seamless integration of SmartProxy with the Maskfog browser for a secure and private browsing experience.