1. Official Website Address
2. How to Configure?
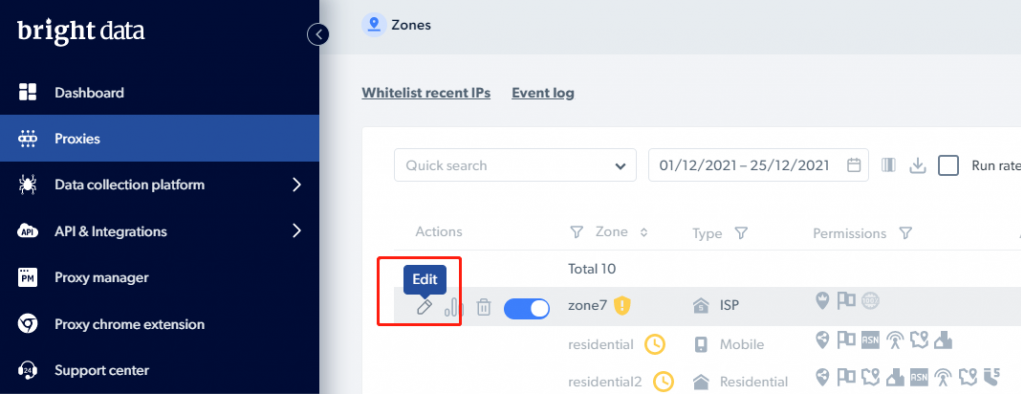
1. Log in to your Brightdata(Luminati) account, go to [Proxies] page to choose a zone, and click [Edit].
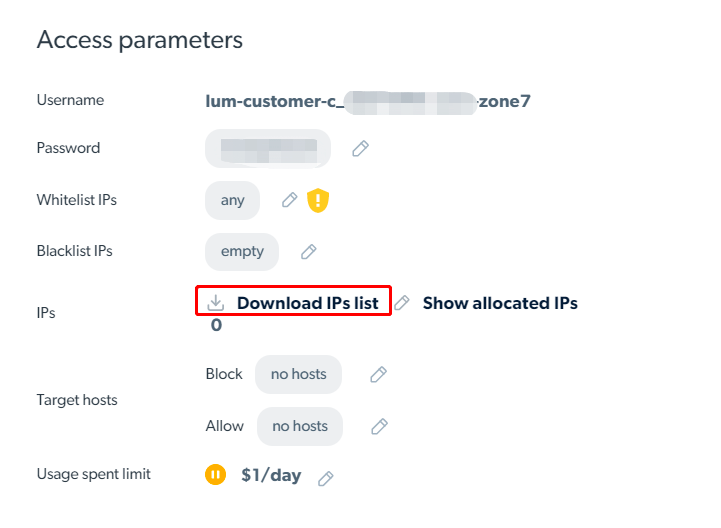
2. Click the [Download IPs list] and you will get a txt file.
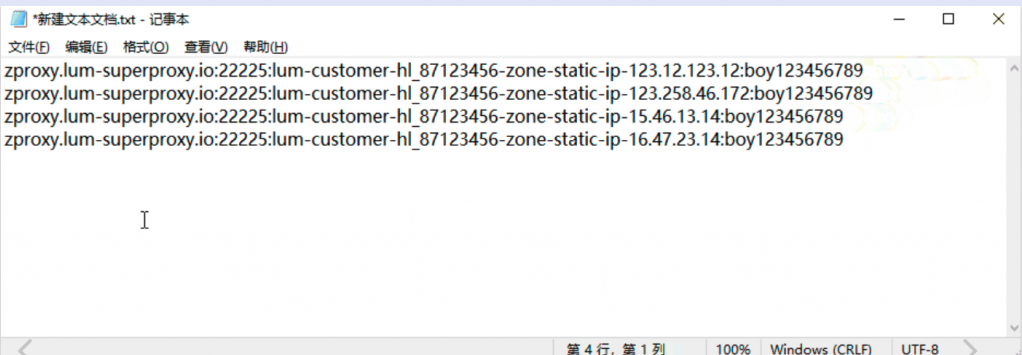
3. Open the txt file, where includes proxy information of every proxy. Each proxy information stars from “zproxy.lum-superproxy.io” as shown below.
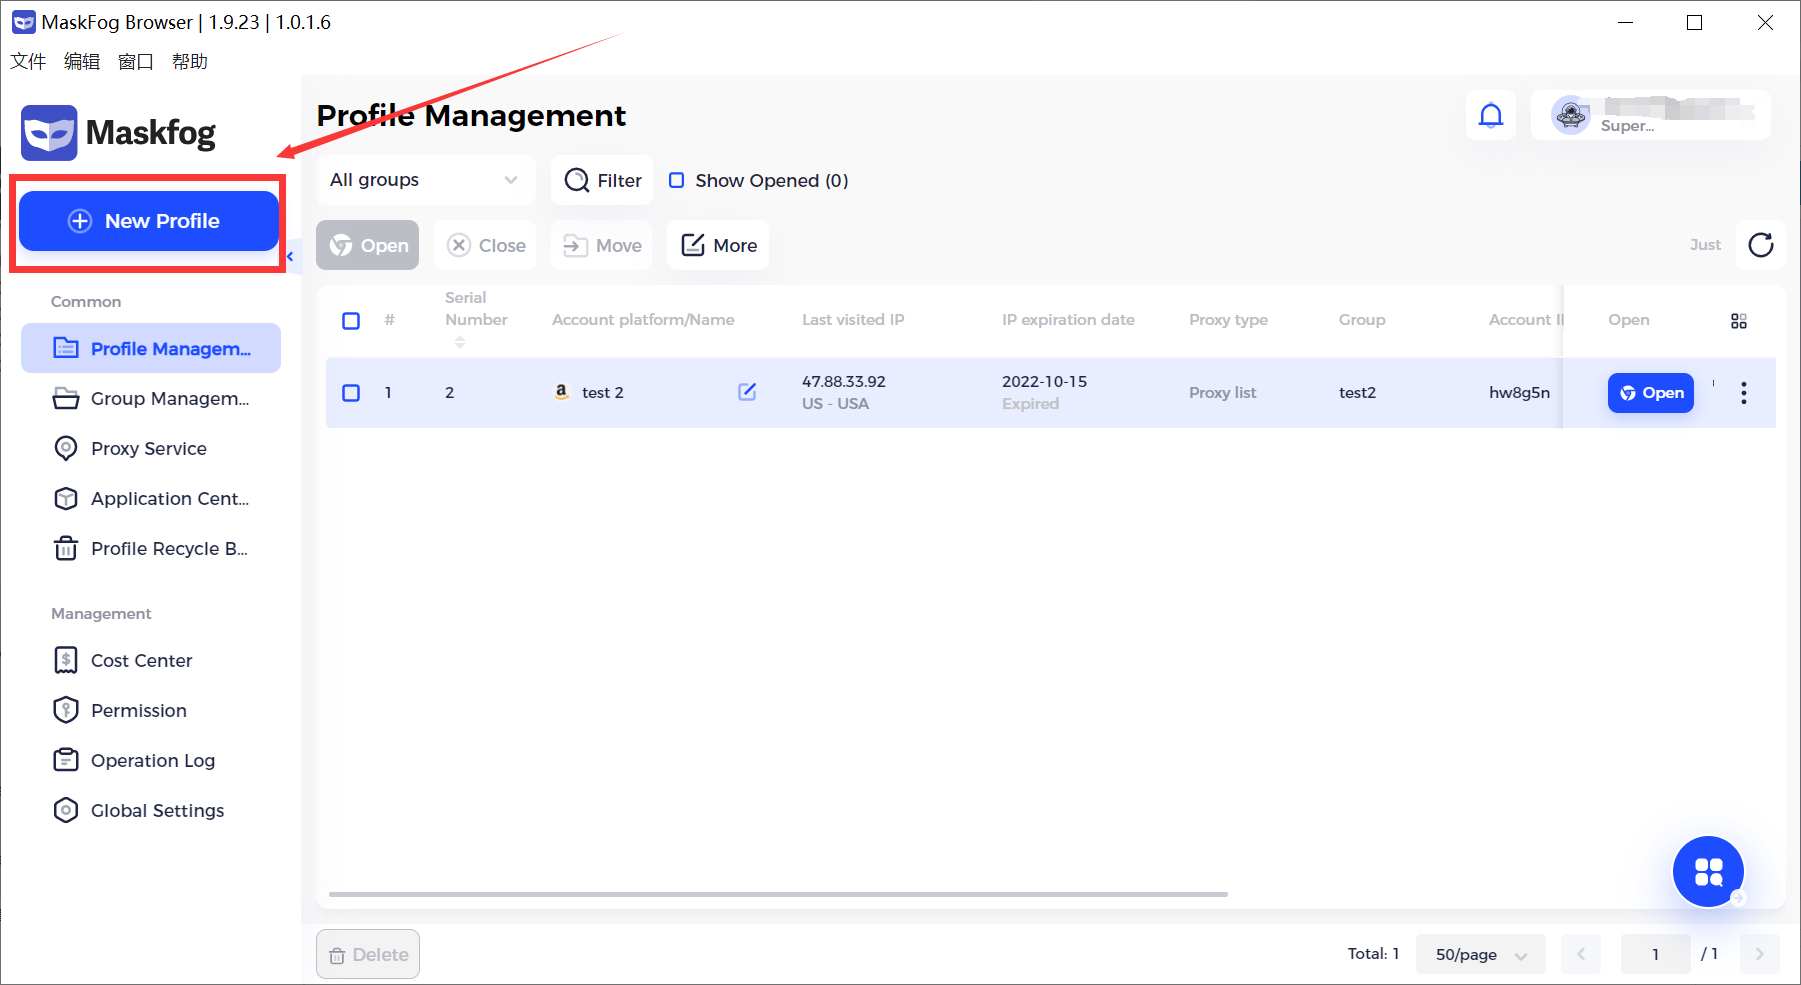
4. [New Profile] -> [Single Import]
5. Fill in Name (optional)
6. Select a group
7. Select User Agent (OS and browser version)
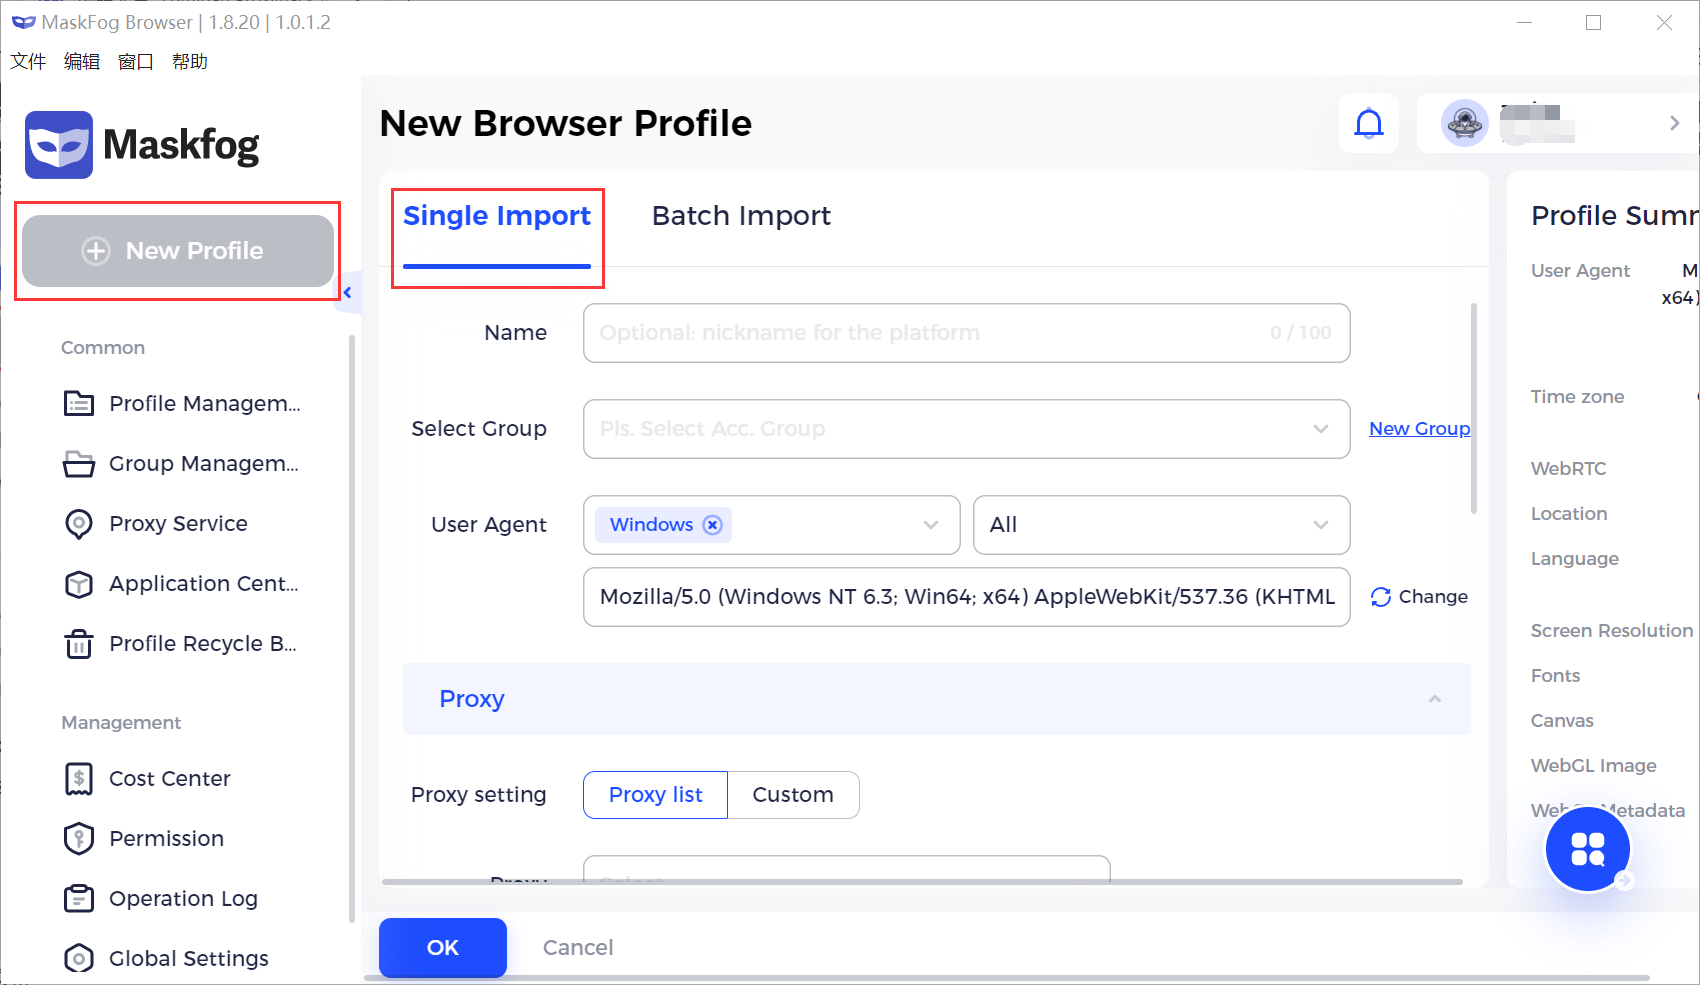
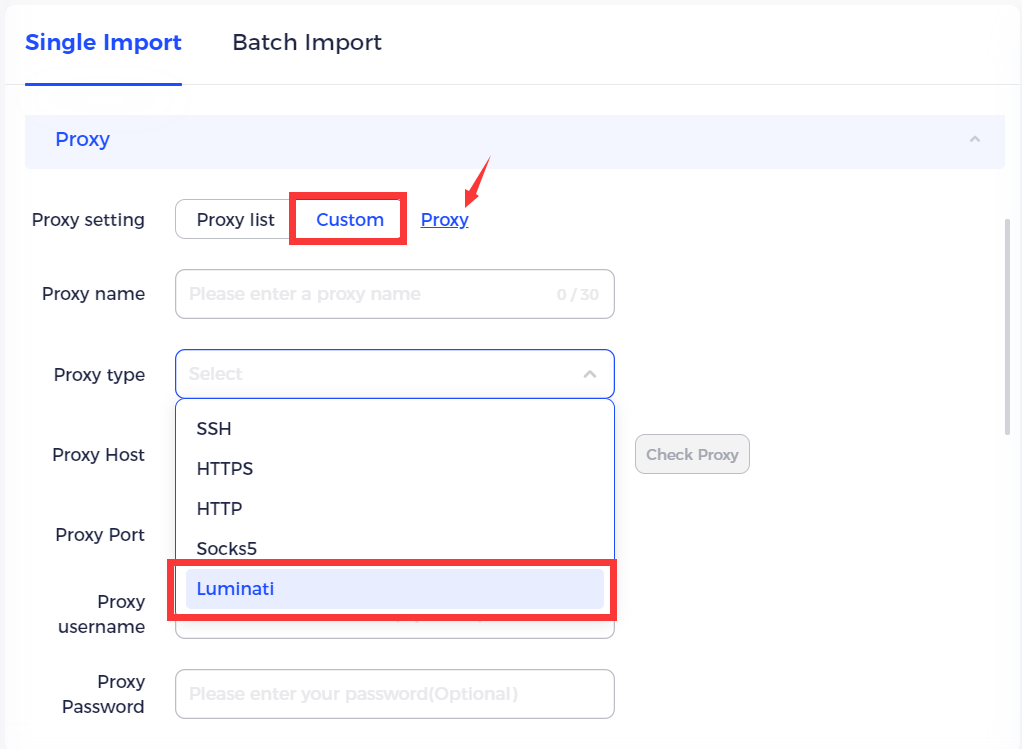
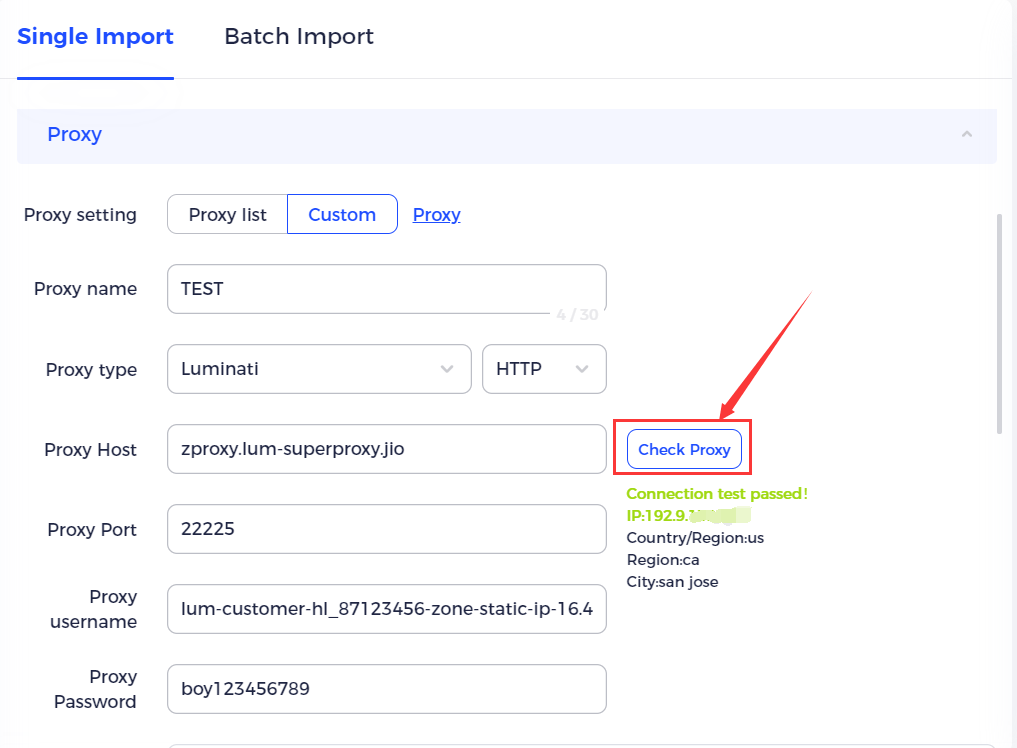
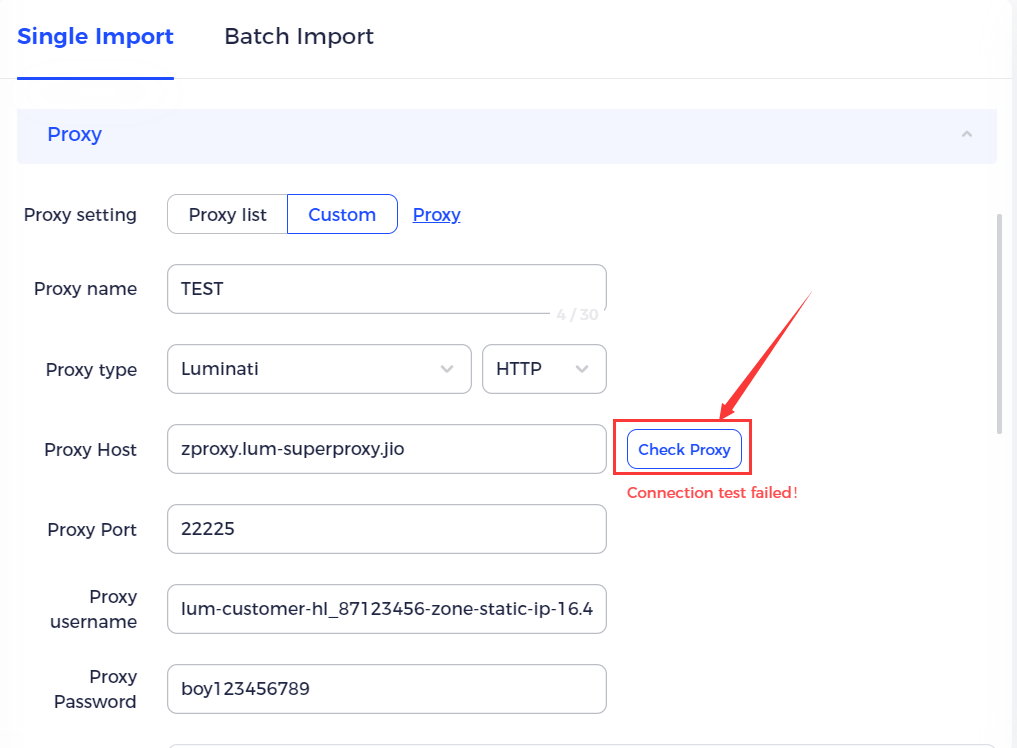
8. [Proxy] -> select [Custom proxy], and choose proxy type as Luminati. Paste a proxy information you got in Bright Data TXT file into [Proxy host]. After that, Proxy Host, Proxy Port, username and password will be filled automatically. Please click [Check Proxy].
8.1 “Connection test passed!” means this proxy is available.
8.2 “Connection test failed!” means there is no connection between your Internet and the proxy server. Please refer to <How to check your prock> to solve this problem.
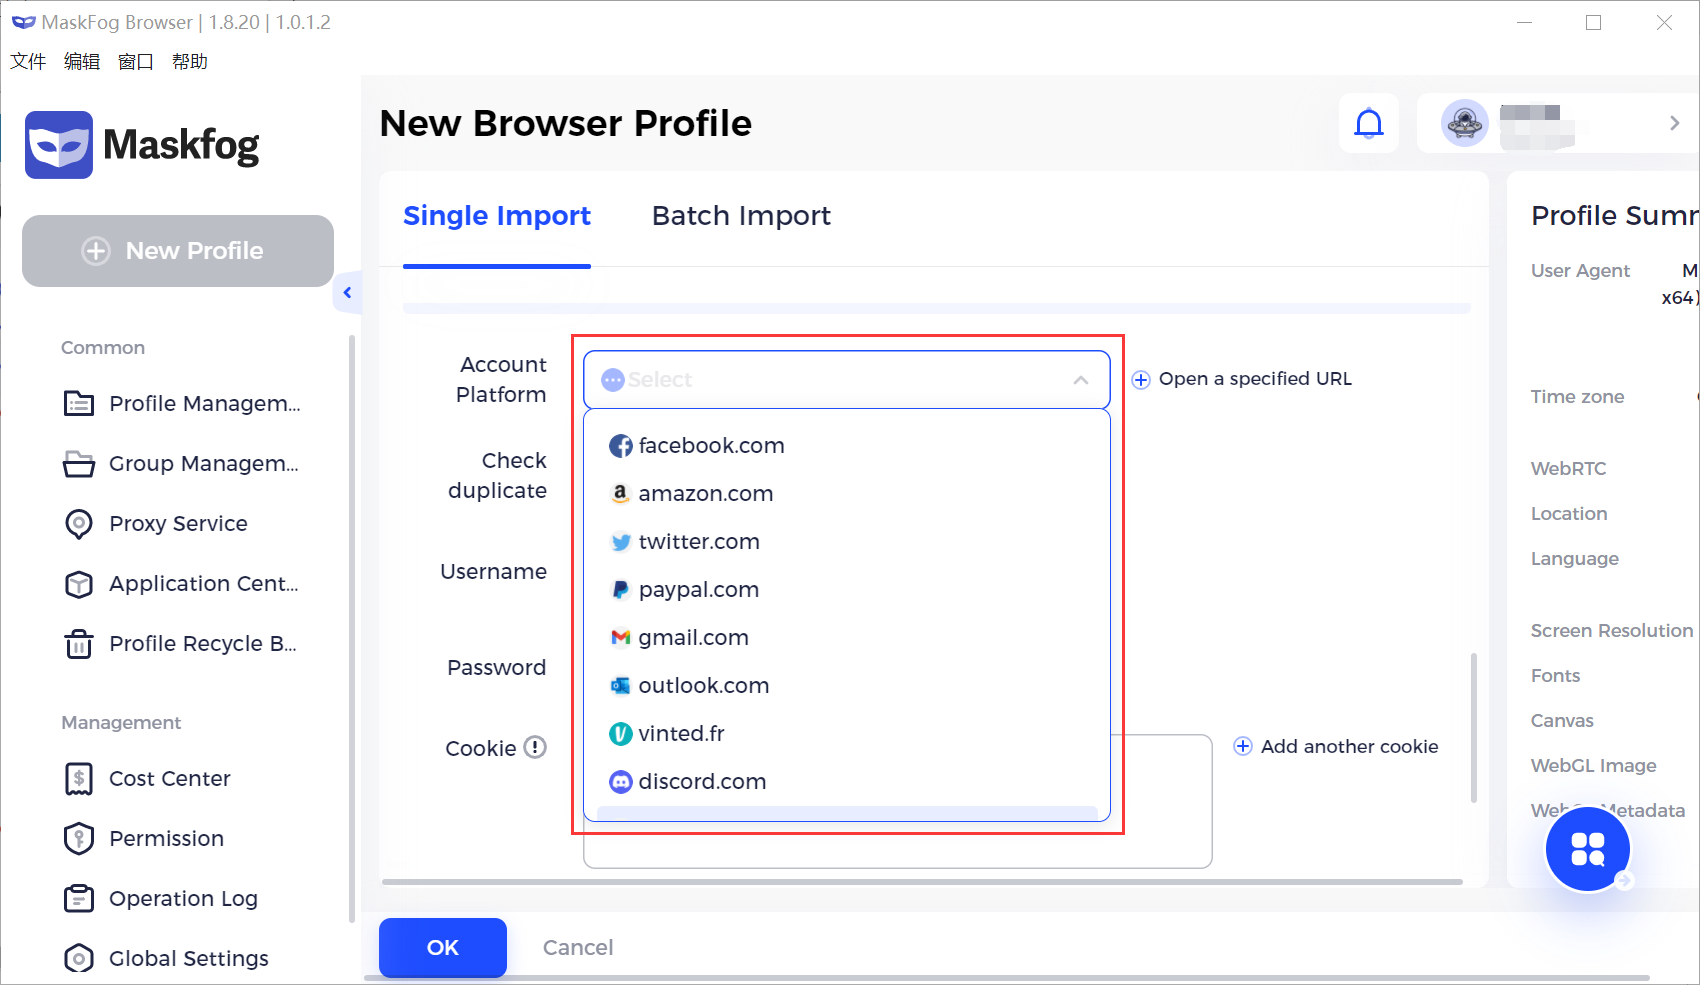
9.Information -> Account Platform. Select the platform you want to access. If the drop-down box doesn’t contain the platform you need, you can select [other] to open a specified URL.
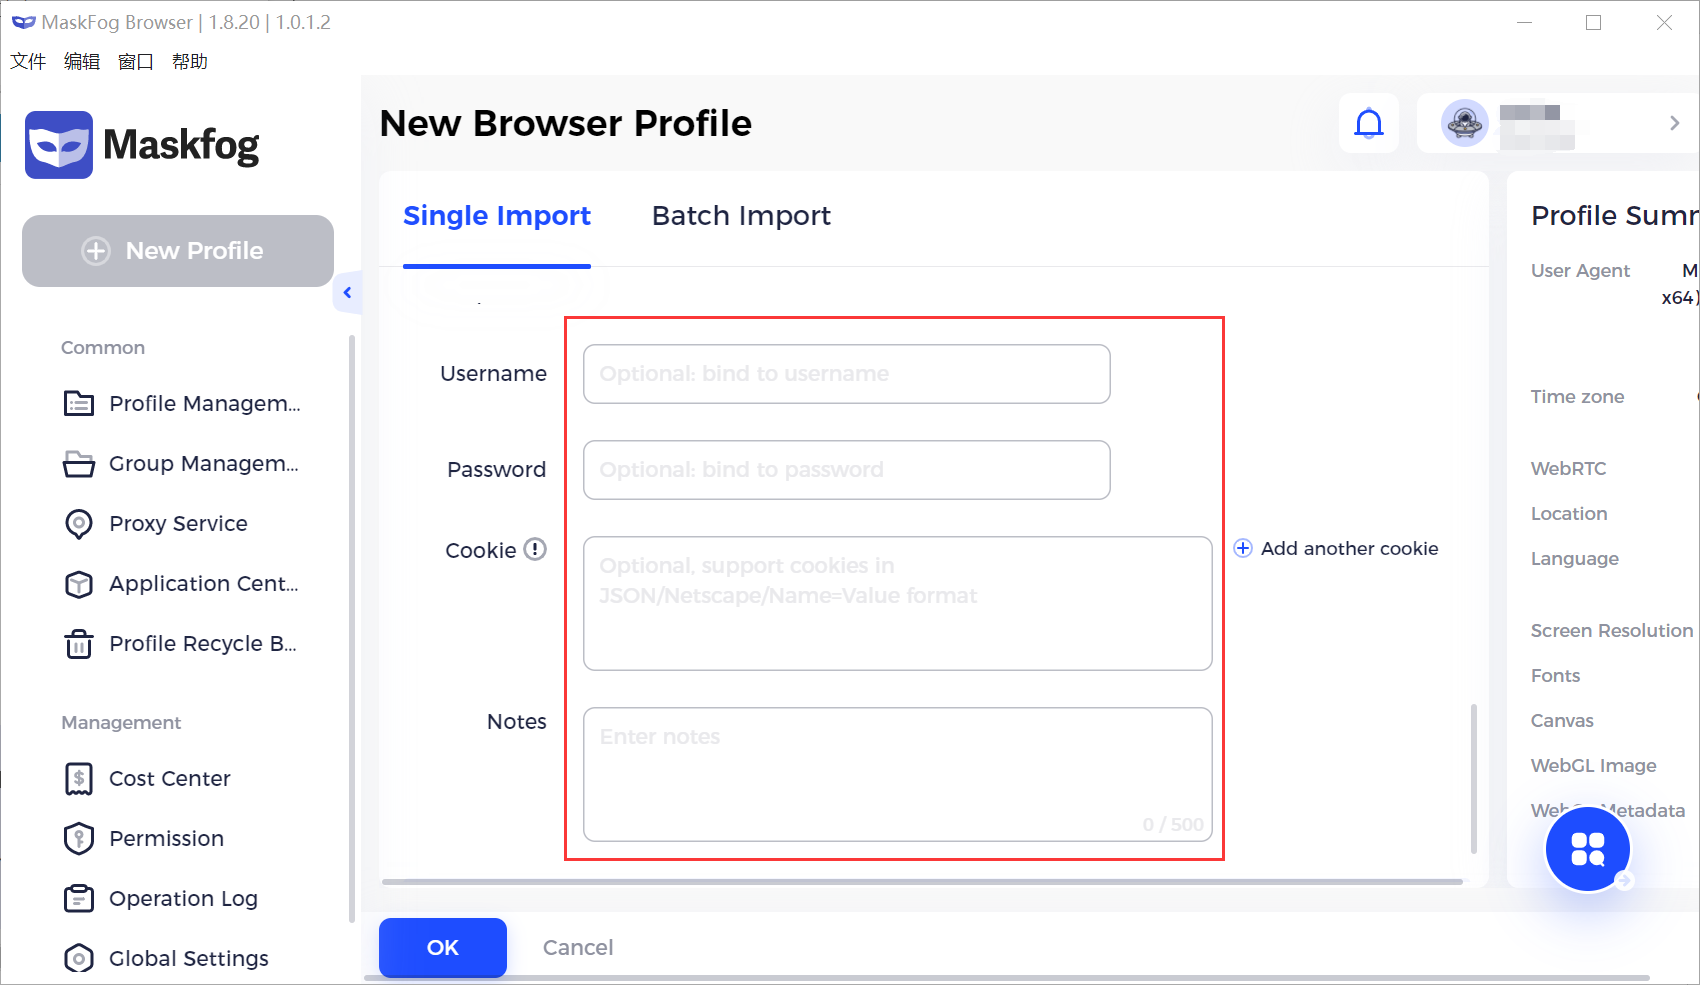
10. Fill in Username (the username of your account on the platform, optional)
11. Fill in Password (the password of your account on the platform, optional)
12. Fill in Cookies (optional)
Note: Please un-tick the [Check Duplicate] boxes.
13. Fill in Notes (optional)
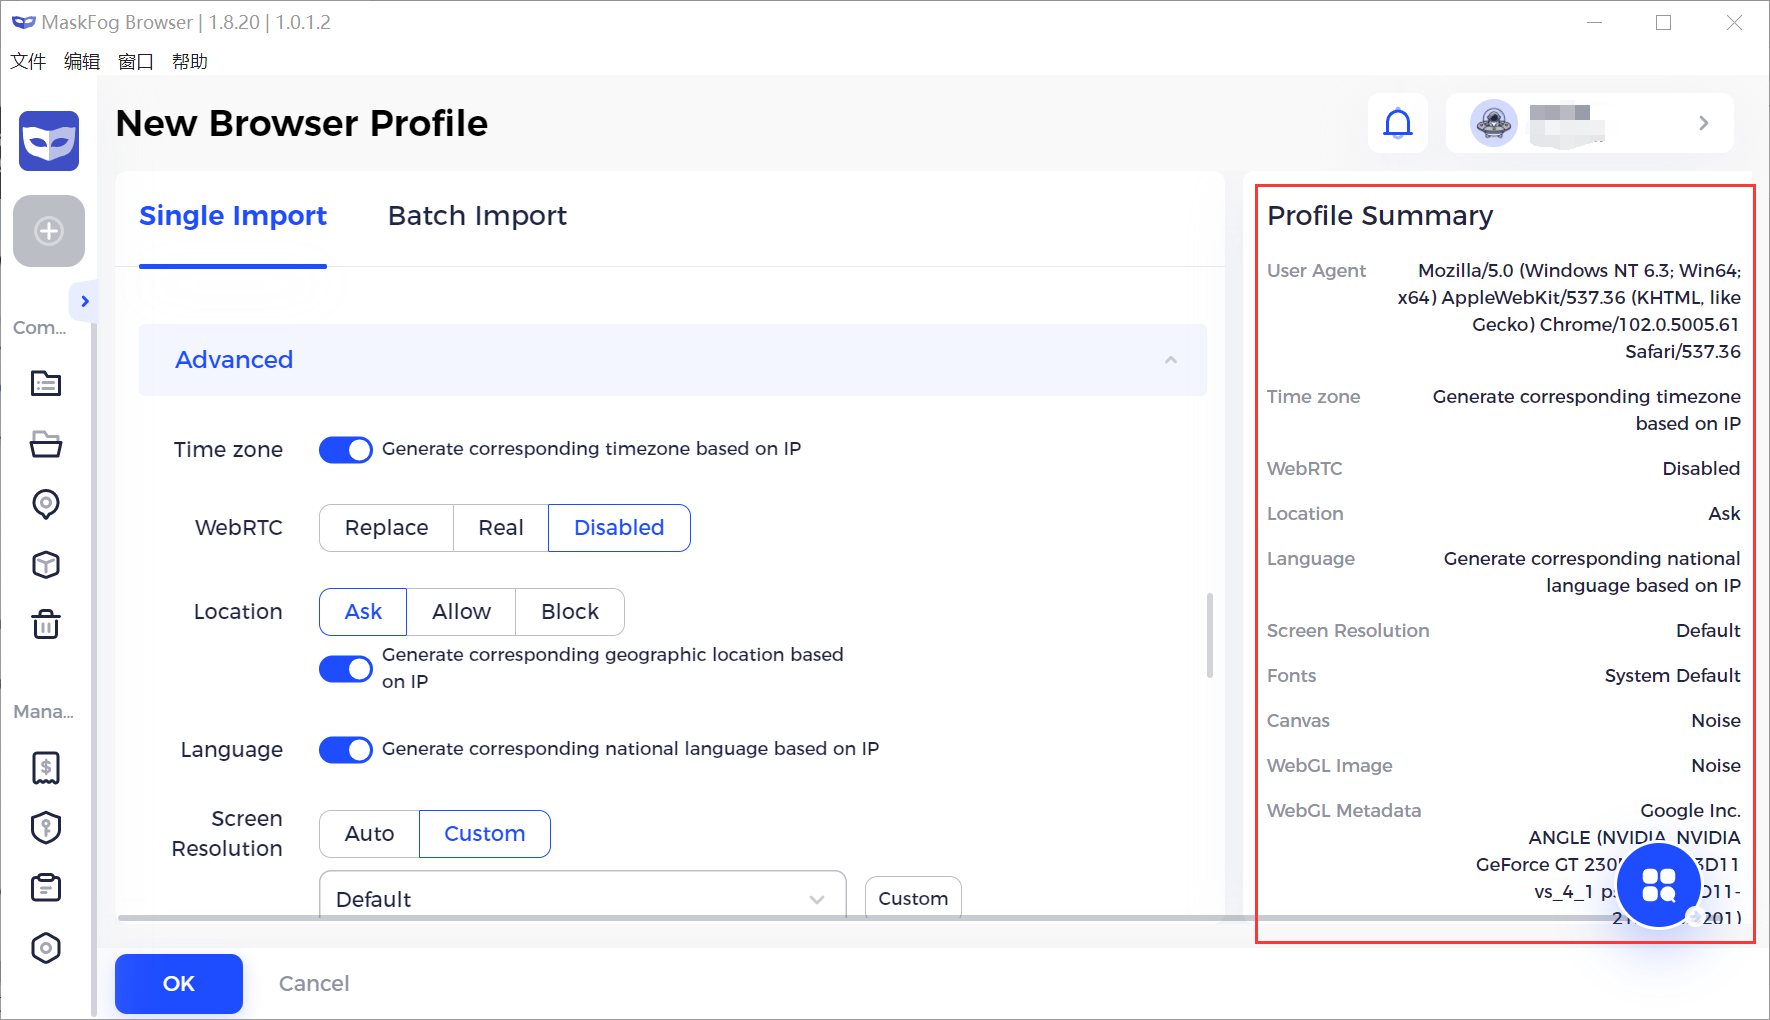
14. In [Advanced] browser fingerprints are set by default, while you can change them. You will see Profile Summary in the right
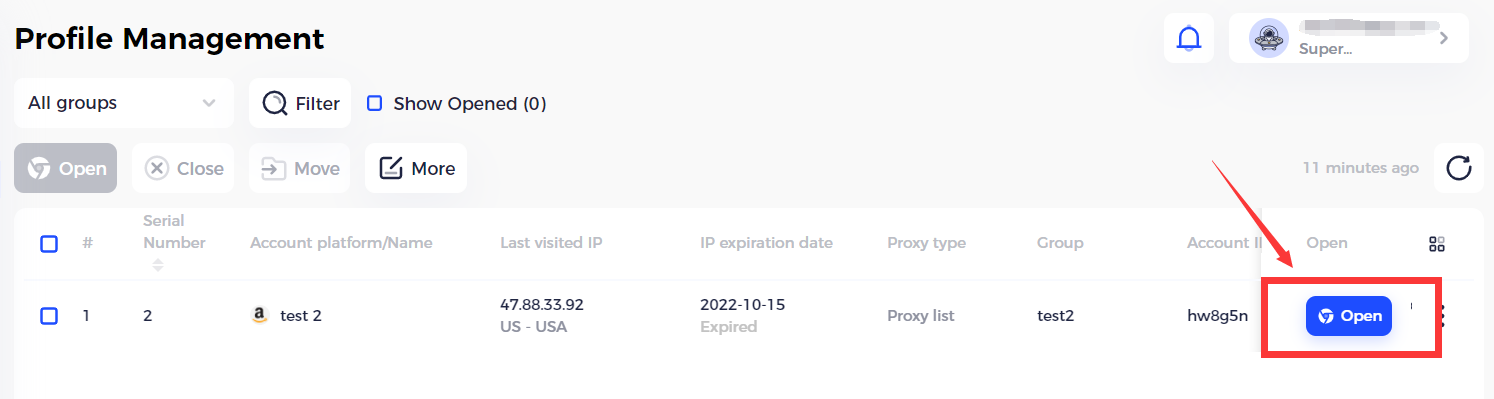
15. Click the OK button to view the just created profile in the [Profile Management] page. Click the Open button to launch this browser.
16. Refer to the <Batch Import> chapter if you need to batch import profiles.